Thursday, January 19, 2012

Penuche (Brown Sugar Fudge)


Last week I was in a cooking funk.  I just could not find anything that inspired me to get up out of my chair and create. I get like that sometimes, just completely "cooked out". But my brain works against me because I am still thinking boy I could really go for a piece of cake or a brownie or a ...(I suffer from an overactive sweet-tooth). It's a tug of war between my laziness and my cravings.

Well, my cravings (and that insistent sweet-tooth) won out and I ended up making something I have never made before, fudge.  What's more it was a unintended adventure as I originally set out to make these coffee squares I had found in one of my many cookbooks.

The recipe looked good, a nice little square to have with a cup of coffee or tea, so I went ahead and started to make them.  Half way through I notice the recipe calls for 3 ounces of vanilla fudge chopped (this is why most people read through a recipe before embarking on the "making it" part). 


I stopped and thought, "well sh--, I don't have any fudge. Do I make them with out it?" Most rational people would say yes, but apparently I am not a rational person because all of a sudden I find myself at 8 o'clock at night whipping up a batch of fudge for the first time!

And the outcome? Well, I'll be honest it was not easy and at one point I thought I had ruined it by stirring for too long but in the end it came together beautifully.  It was creamy and rich and had a lovely taffy flavour as I decided to make Penuche or Brown Sugar Fudge instead of the Vanilla Fudge the recipe called for.

And the squares? They were not great, WAY too sweet with the addition of the fudge, but I'm so glad I let my sweet-tooth talk me into getting out of my chair. I have always wanted to try making fudge, and now I have, quite unexpectedly and, hurray, successfully!


Penuche (Brown Sugar Fudge)
This recipe is adapted from the Better Homes and Gardens Cookbook

Prep time: 5 minutes
Cook time: 1 1/2 hours
Total time: 1 hour 45 minutes
Yield: 32 servings

Ingredients
  • 1 1/2 cups sugar
  • 1 cup packed brown sugar
  • 1/3 cup half and half cream
  • 1/3 cup milk
  • 2 tablespoons butter
  • 1 1/2 teaspoons vanilla
  • pinch salt

Directions
  1. Line an 8 inch square baking pan with parchment paper. Generously butter the parchment and set aside.
  2. Butter the sides of a heavy 2 quart saucepan. Combine the sugars, cream, milk and pinch of salt. Cook and stir at medium heat until the sugars dissolve and the mixture begins to boil. Clip a candy thermometer to the side of the pan and reduce the temperature to medium low. Continue to cook and stir until the thermometer reads 236 degrees (soft ball stage). This takes about 15 - 20 minutes.
  3. Immediately remove from the heat but keep the thermometer clipped to the side. Add the butter and vanilla but DO NOT STIR.
  4. Leave the fudge to cool to 110 degrees, about 45 minutes to 1 hour. Remove the thermometer and beat vigorously with a wooden spoon (the mixture is quite thick) for about 10 minutes or just until it begins to lose its gloss. (this is where I made the mistake and beat it a little too long. It changes in an instant from smooth mixture to dry fudge, so be careful)
  5. Spread into the pan. Leave it until it is firm then cut into squares. Enjoy!

 

Wednesday, January 11, 2012

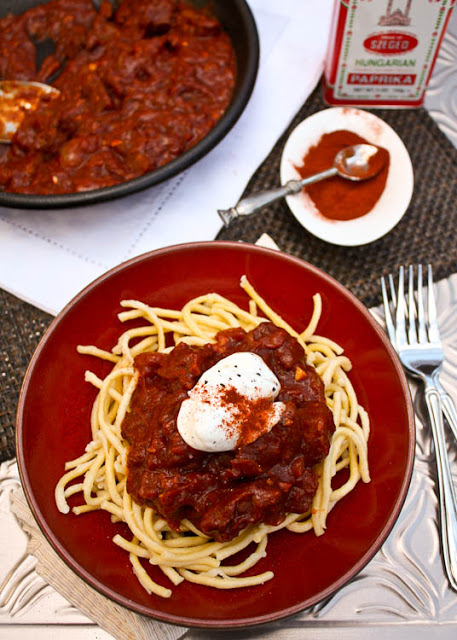
Hungarian Goulash


I try not to get stuck in a routine when cooking. I do have a roster of favourite recipes that make a pretty regular appearance but I like to be adventuresome and venture into the untried as often as possible. I think it is one of the best parts of life that there never seems to be a lack of new flavours, tastes and combinations to try. Plus, I want to encourage my children to keep an open mind and develop a sense of adventure as well.

So when I bought some stew beef the other day I resolved to do something other than my usual, which is pretty similar to what I do for chicken stew but with red wine, beef stock and rosemary.  I wanted to try something new, with flavours that would be pretty out of the ordinary for my kids. All of which led me to decide on Goulash.

Now, I am am not saying Goulash is hard to make or that it is a complex recipe, because it is the same process as any other stew, it is just something that quite honestly has never graced our dinner table. I was not sure if I would like it and I knew there was a good chance my husband and kids would want nothing to do with it, as they are far less adventuresome than me but I forged ahead anyway.

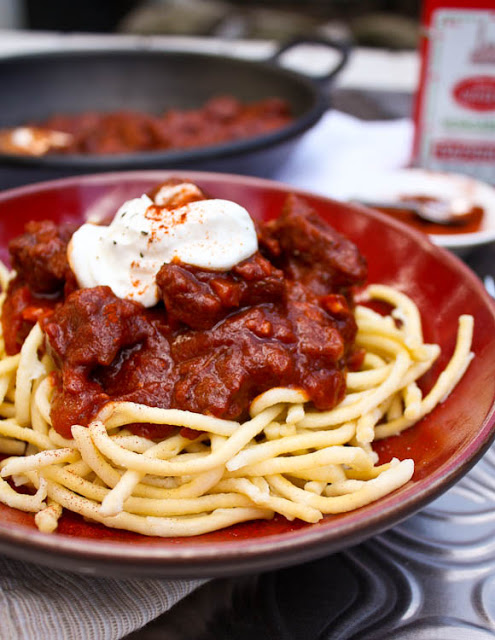
How did it turn out?  Truth be told I didn't love it.  It was good and hearty and the spaetzle was a nice accompaniment but I found the paprika flavour overpowering.  My husband however, thought it was delicious and my kids, much to my surprise, really liked it too.
So, why am I telling you all this and why am I going to the trouble to give you this recipe if I was not wowed by it?  Well, because you're not going to love everything you make. I think that sometimes the adventure is the thing, even if it does not turn out with the best results. And I do truly believe what Julia Child said: "Learn how to cook- try new recipes, learn from your mistakes, be fearless, and above all have fun!”

So here is the recipe, and if you have never made Goulash, I suggest you try it. It might become one of your all time favourites, or you may not love it. That is the risk, that is the adventure and, to me, that is what makes it so much fun.


Hungarian Goulash
I adapted this recipe from one that I found on Allrecipes.

Prep time: 15 minutes
Cook time: 1 1/2 to 2 hours
Total Time: approximately 1 3/4 hours
Serves 4

Ingredients
  • 1/4 cup olive oil
  • 1 pound stew beef
  • 2 medium onions diced
  • 2 cloves garlic, minced
  • 1 1/2 tablespoons sweet Hungarian paprika
  • 1/4 cup tomato paste
  • 3 cup beef stock
  • 1 teaspoon kosher salt
  • 1/2 teaspoon freshly ground pepper
Directions
  1. Brown the beef in the olive oil in batches using a large dutch oven sauce pan with a heavy bottom. Make sure all pieces have a been browned nicely on all sides. Remove from the pan and set aside.
  2. Add the onions to the pan and saute 2 - 3 minutes until translucent. Add the garlic, paprika, salt and pepper and cook 1 minute more. Return the beef pieces to the pan. Add the tomato paste and stock and scrape the bottom of the pan to mix in any of the caramelized meat that has stuck to the bottom. Stir to mix all the ingredients and then bring to a boil.
  3. Reduce to a simmer and cover. Let simmer, stirring occasionally, for 1 1/2 to 2 hours or until the meat is tender and the sauce has thickened. You can add additional stock if the sauce becomes too thick.
  4. Taste and adjust the salt and pepper if needed. Serve over hot buttered spaetzle (you can find spaetzle noodles in the dry pasta section of most grocery stores) or over rice. You can also serve with a bit of sour cream. Enjoy.

Wednesday, January 4, 2012

Curried Chicken Salad


It's January 4th. You know what that means? We are back at it. The Holidays are over, back to work, back to school, well into winter and the long march to Spring. Sound bleak? Well, it doesn't have to. 

If you live in Canada, which I do, you have to learn to embrace Winter. Sure, you can maybe escape it for a week or two but in the end you still have to just go with it.  I was never very good at that but I have to admit now that I have kids I am much better. They see so much fun and excitement in everything that it is hard not to be affected by their enthusiasm. So we get out and skate, toboggan and just keep going no matter what and I kind of think that is the way to approach life in general. 

The Holidays are fun but I don't like the thought that there is a big build up and lots of fun and family and good food and then nothing for months on end, so I resolve (boy I hate that concept) to continue to enjoy and not treat the rest of the season like a punishment. 


Anyway, I am not a big cleanse, get your life back on track, 30 days of carrot juice kind of gal. To me that is just adding insult to injury. So let's have a great January and February and lets try to make the little things fun and special and not save it all up for a couple of weeks in December.

Let's start with lunch.  If you are brown bagging it, then don't condemn yourself to an uninspired meal of carrot sticks and rice cakes. Let's spice it up a bit, add some zing. This little bit of chicken salad heaven is one of my favourite ways to use up leftover roast chicken.  It is full of texture and taste. 

You can change up the ingredients to suit your palette but I love it with a mixture of green grapes, apples, celery, a bit of onion and some chopped walnuts.  It is crunchy, sweet, spicy and cooling all at the same time.  Serve it on its own or on some spring greens.

I like it in a sandwich and I prefer a dense sourdough because I think it requires a bread that can stand up to all those ingredients. We have a great bakery here in Hamilton that uses local, organic ingredients called De La Terre. They also make a mean sourdough, so that was the perfect accompaniment. So delicious. Now we can start looking forward to January!


Curried Chicken Salad


Prep time: 15 minutes
Total time: 15 minutes
Yield: about 4 cups of salad

Ingredients
  • 3 cups diced cooked chicken 
  • 1/2 medium sweet onion (such as Vidalia or Red), diced
  • 2 stalks celery, cut into 1/4 inch slices
  • 1 small granny smith apple, cored and diced
  • 1/4 cup seedless green grapes, quartered
  • 1/4 cup toasted chopped walnut pieces
  • 1/4 cup mayonnaise
  • 2 teaspoons curry powder (your choice hot or mild and add more if you like a stronger flavour)
  • salt and pepper to taste
Directions
  1. In a small bowl, combine the diced chicken, vegetables, fruit and walnuts. Mix in the mayonnaise, curry powder, salt and pepper. Taste and adjust the seasoning to suit.
  2. You can either plate the salad with a bit of lettuce and add a dollop of Mango Chutney on the side or you can serve it on a sandwich. I spread about a teaspoon of Mango Chutney on both slices of bread (I like the Patak's Hot Mango Chutney but you can use any kind or leave it out all together) and then fill with the Curried Chicken Salad mix and a bit of lettuce. Enjoy!

Thursday, December 29, 2011

Turkey Croquettes


If you are like me it is now day four of "what do I do with all the turkey leftovers". I was the host this year for Christmas Dinner. My parents, my sisters and their children all gathered at our new home in Hamilton for the "roast beast". I enjoy playing host, so I was excited to have everyone here.

In honour of the occasion I ordered a lovely 17 lb turkey from Julia's Poultry and Eggs at the Hamilton Farmer's Market. It was perfect, antibiotic and hormone free, locally grown and delicious.  However, despite everyone's best efforts, we were still left with an enormous amount of leftover turkey (as well as mashed potatoes, sweet potatoes, stuffing, etc, etc).


So, what to do with all of this food now that there is just the four of us to finish it off? Honestly, I was not in the mood for stew and I am NOT a fan of Turkey Tetrazzini. On the first night we did Hot Turkey Sandwiches, which is just some of the leftover turkey simmered in the leftover gravy and served over a slice of toast.  It was delicious, but did not completely solve the leftover dilemma as I was still left with a good pound of turkey. 

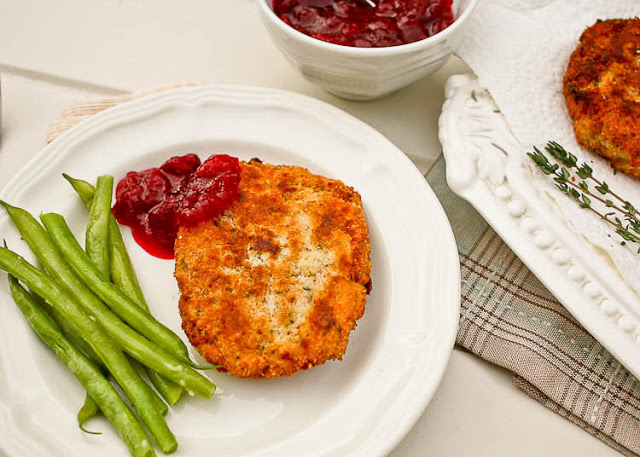
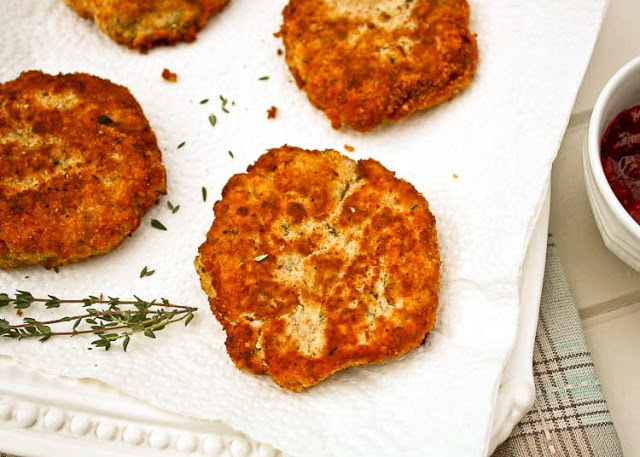
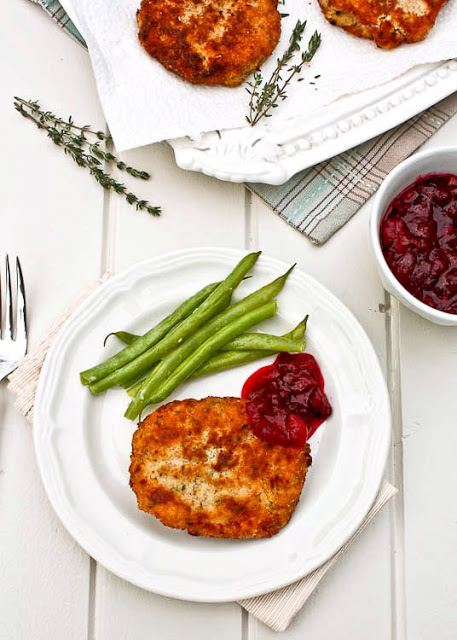
A quick search led me to the idea of making Turkey Croquettes.  I wanted something easy and a little different from the norm. Plus, I was able to use up some of the other leftovers in the recipe, so it was a great solution. The croquettes were lovely. Moist on the inside with a nice crisp outer coating of breadcrumbs.  Served with cranberry sauce and a few steamed green beans it was a perfect light dinner.

This recipe would work well with any number of substitutions. You could use leftover roast chicken, duck or pork or try it with salmon or shrimp.  I would just change the seasoning to suit the meat, like rosemary for the pork or dill for salmon or shrimp. I would also not use sweet potatoes with fish (but that's just me).  The possibilities are endless.

Now, if I could only figure out what to do with the rest of the turkey...hmm, maybe a curry.


Turkey Croquettes
This recipe is adapted from Martha Stewart.

Prep time: 20 minutes
Cook time: 20 minutes
Total time: 40 minutes
Yield: 6 - 8 croquettes


Ingredients
  • 2 cups finely diced or shredded cooked turkey
  • 1 medium onion, finely diced
  • 2 tablespoons olive oil
  • 1 teaspoon dried thyme (or 2 teaspoons of fresh)
  • 1 teaspoon chopped fresh sage
  • 1/4 cup half and half cream
  • 1 teaspoon kosher salt
  • 1 teaspoon freshly ground pepper
  • 1 cup leftover mashed potatoes
  • 1/2 cup leftover mashed sweet potato
  • 1 egg
  • 1/4 cup all purpose flour
  • 1 1/2 cups breadcrumbs, season with salt and pepper to taste
  • vegetable oil for frying

Cooking Directions
  1. In a large skillet over medium-high heat saute the onions in the 2 tablespoons of olive oil. Cook for 2 - 3 minutes or until the onions are translucent. Stir in the herbs and salt and pepper and cook for 1 minute more. Stir in the turkey and cream, and cook until liquid evaporates, about 1 minute.
  2. Transfer to a large bowl, and let cool for 15 minutes. Add the potatoes, flour, and egg and stir until combined.
  3. Take about 2 tablespoons of the turkey mixture and gently work it into a flat disk with your hands. Coat with the breadcrumbs and arrange, in a single layer, on a platter or baking sheet. Refrigerate for about 10 minutes.
  4. Heat 1/4 inch of oil in a deep skillet over medium heat. Working in batches, (about 2 - 3 croquettes at a time) cook croquettes in a single layer until golden brown, about 2 minutes per side.
  5. Transfer to paper towels to drain. Serve immediately.

Wednesday, December 21, 2011

Shortbread Cookies


Come Christmas Eve we will leave a plate of cookies out for Santa. Now, I 'm sure this isn't a revelation to you. Everyone knows that Santa likes a little snack after he has filled the stockings. So I am quite sure this ritual will be happening all over town.

But that doesn't mean we can't stop to talk about this a minute. Because I've thought a lot about it. Look, you're busy, Santa's busy. I get it, we need to keep this simple. Plus, he has so many houses to visit, I think it is best to keep it light. He doesn't want to be weighed down, over-stuffed by the end of the evening. He just needs a quick bite, a bit of milk and he's on his way.


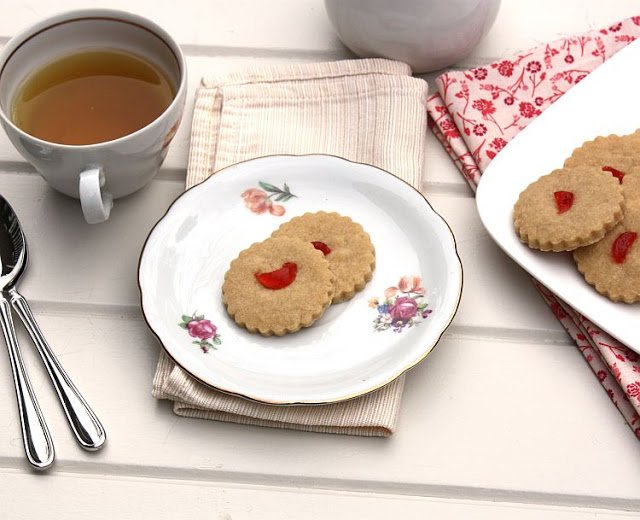
So for me, that means Shortbread Cookies. They look gorgeous, pale golden brown with a splash of red. Crisp, buttery and delicious in their simplicity. They are a classic, just like Christmas on a plate.

These are traditional Scottish Shortbreads. No corn starch, no icing sugar; they are the real deal. Just three ingredients: butter, brown sugar, flour and that's it. You can press the dough into a shallow dish to bake and cut into squares or you can roll it out, as I did, and cut them into whatever shape you like. Add a bit of glace cherries for colour and you have cookie perfection.

Trust me. Santa will love you for it. You might even find a little extra in your stocking this year! (And don't forget to leave a little something out for his reindeer.)


Shortbread Cookies
Prep time: 10 minutes
Cook time: 10 minutes
Total time: 20 minutes
Yield: 2 dozen cookies

Ingredients
  • 2 1/2 cups all purpose flour
  • 1 cup room temperature butter
  • 1/2 cup brown sugar
Cooking Directions
  1. Preheat the oven to 300 degrees.
  2. In a medium bowl, cream the butter and sugar. Add the flour and mix well until incorporated into a dry stiff dough. It is easier to do this in a stand mixer as the dough takes a bit of mixing to come together, but it is more than possible to do by hand, it just takes a bit of elbow grease.
  3. If you want to bake into squares press the dough into a 9 inch square cake pan lined with parchment. You can score the top or prick with a fork in a decorative patter. Bake 20 -25 minutes until light golden and just set in the middle. Remove from the oven and turn the cookie sheet out once cooled. Cut into squares.
  4. If you are cutting the dough into shapes, dust a clean cooking surface with flour. Form the dough into a ball and roll out to a 1/4 inch thickness. The dough is dry so it will crack when you roll it, don't worry, just press it back together and keep going.
  5. Cut with your favourite cookie cutter and decorate with glace cherries or silver dragees. Transfer to a cookie sheet, keeping cookies an inch apart.
  6. Bake in the centre of the oven for 10 - 12 minutes or until the edges are golden. Remove, cool and enjoy!

Related Posts Plugin for WordPress, Blogger...